How to use filters in landscape photography

Photographic filters have always been accessories in the equipment of professional photographers and more advanced enthusiasts. Despite the digital era somewhat relegating them to a secondary role, favoring post-production software tools over traditional glass filters, those involved in landscape photography are well aware, or should be aware, of the undeniable advantages that come from using these objects.

With this guide, I want to introduce you to the use of photographic filters, focusing on a particular type: Neutral Density filters, both solid and graduated.
Additionally, to avoid approaching the topic solely from a theoretical standpoint, I’ve decided to integrate concise reviews of the various components that make up my kit, which I must say I am more than satisfied with. So, it’s a kind of theoretical/practical ‘lesson’ for approaching landscape photography with a slightly more technical approach.
TWO MAJOR CATEGORIES
Let’s begin this guide by categorizing photographic filters into two major groups:
Screw-in filters, which are circular in shape.
Square filters, which are rectangular/square in shape.
This premise, although obvious, is necessary to address the topic without misunderstandings. With that said, we can now start delving into the aforementioned categories.
Screw-in filters
Screw-in filters are circular in shape and feature threading, allowing them to be screwed onto the front part of the lens.
They are typically made of glass. Since the vast majority of lenses (objectives) available on the market have a front threading, this category of filters is also the most well-known and commonly used.

Every lens and therefore every filter has specific diameters, and these measurements in millimeters (mm) are always indicated on each product. With this knowledge, before proceeding with a potential purchase, it’s necessary to choose a filter with the same diameter as the lens you intend to use it with.
These accessories have the advantage of being compact and easy to attach/detach. However, in the case of graduated filters, which have a non-uniform (gradated) coloring, they do not allow for shifting the gradation in any direction (up, down, right, left) since they are screwed onto the lens.
Furthermore, if you own lenses with different diameters, you’ll need to purchase multiple sizes of the same type of filter.
Among the circular screw-in filters commonly used in landscape photography are polarizers and standard neutral density filters (uniformly dark, non-graduated).
Square filters
Square filters come in rectangular or square shapes and are attached to the camera using a special holder that is placed between the filters and the lens.

This system allows for the translation of filters along an axis, enabling their position adjustment. While for a homogeneous ND filter, this degree of freedom doesn’t offer any benefits, for gradient filters, it’s an unparalleled advantage.
On the other hand, square filters are bulkier, delicate, and require a specific holder for use.
In general, these filters are made of either resin or glass.
Regarding this category, the most commonly used ones in landscape photography are undoubtedly the Graduated Neutral Density (GND) filters, also known as gradient neutral filters.
FUNCTIONALITY OF THE MAIN FILTERS USED IN LANDSCAPE PHOTOGRAPHY
After understanding the two main formats available in the market, let’s now continue by analyzing their functionalities.
Preliminary Notes:
– all the types listed below are available in both screw-in and square formats.
– I also reserve the right to expand this section in the future with any new filters.

Neutral Density Standard (ND)
They allow for reducing the amount of light entering the lens uniformly. They become essential when attempting long exposures in very bright environments. Even when setting the camera to the lowest ISO value and the smallest aperture, it’s not always possible to achieve sufficiently long exposure times.
The term “Neutral” signifies that these filters do not introduce chromatic shifts but simply attenuate incoming light in a neutral manner.
They typically appear in a neutral gray color.
In practice, they behave similarly to a pair of sunglasses with homogeneous gray lenses (not gradient). By using these filters, available in various intensity values depending on the amount of light they can hold back, it’s possible to achieve the desired exposure times.
A typical use of these filters can be observed in photos of waterfalls, streams, etc., where flowing water creates a smooth white trail (similar to silk). They are also used to blur the movement of clouds in windy conditions or to “flatten” the water of seas, lakes, or rivers, which is typically in motion or rippled.

Graduated Neutral Density (GND)
They are a variation of Neutral Density filters.
The darkening of the glass is gradual, starting from one end, gradually transitioning to a lighter shade.
They are primarily used in landscape photography to “compress” the dynamic range of the scene being captured, effectively darkening the brighter areas and allowing for an extended “virtual” exposure latitude for the digital sensor (or film).
These filters enable the capture of more “balanced” photos. A typical situation involves a much brighter sky compared to a considerably darker ground (or foreground), for instance.
They come in a graduated neutral gray color and are available in various intensity values.
There are mainly two types of gradations:
A HARD gradation, with a sharper and more distinct transition, suitable for shots with linear and well-defined horizons (seascapes and lakes).
A SOFT gradation, with a softer and extended transition, suitable for situations with rugged or less defined horizons (mountains, trees, etc.).
In practice, they behave similarly to a pair of sunglasses with gradient gray lenses.

Polarizer
Thanks to a particular property of the glass used, this filter significantly reduces glare and reflections from water surfaces and other surfaces like glass.
This characteristic allows for “retrieving” the transparency of water, greatly enhancing the visibility of underwater environments, lakes, and much more. Furthermore, thanks to the same property, it enables capturing more saturated and contrasted skies while minimizing reflections caused by atmospheric moisture.
Since they are not perfectly transparent due to their physical nature (as seen in the accompanying photograph), they also serve as light ND filters.
In practice, they function like a pair of sunglasses with polarized lenses, which aim to reduce unwanted reflections.

UV filters
Finally, it’s worth mentioning, even for purely informative purposes, UV filters.
Generally used to protect the camera lens from dirt, water droplets, scratches, and accidental impacts, these filters were originally designed to filter out ultraviolet rays, which are not visible to the human eye but can be detected by photographic film and sensors.
These rays are more prevalent at high altitudes.
Although their effect is almost imperceptible, they allow for slightly clearer skies and sharper images while also reducing the possibility of subtle blue color casts.
PRODUCT SELECTION
Now that we have theoretically learned about the peculiarities of the main filters, it’s time to delve into the practical aspect of these tools.
From now on, we will focus on the use of square-type neutral density filters, both graduated (GND) and homogeneous (ND), along with the necessary accessories for their use. Personally, I consider these filters to be the most important in landscape photography, along with the polarizer.
Which brands are worth considering?
There are some companies specialized in the production of these accessories. However, not all of them offer the same level of quality.
For informational purposes, I provide a brief list of the main brands, along with their websites, sorted in decreasing order of quality (from the most expensive to the most economical).
Singh Ray – www.singh-ray.com
Lee Filters – www.leefilters.com
Hi-Tech – www.formatt-hitech.com
Cokin – www.cokin.com

When I decided to purchase my first square filters, I found myself having to choose among these brands. Referring to various opinions and recommendations found on the internet, I opted for “Lee Filters,” a well-known English company known for the high quality of its products, yet still at accessible prices.
Therefore, the following guide will exclusively focus on “Lee” elements.
COMPOSITION OF THE BASIC KIT
As I mentioned earlier, to use square filters, you need a couple of auxiliary components to make their use easier and safer.
These elements are:
The filter holder, which serves as a support.
The adapter ring, a connecting element between the lens and the filter holder.
Additionally, we cannot overlook another element, although it falls outside this context but is of vital importance: the tripod.
Therefore, the combination of these components (adapter ring + holder + filters) constitutes the basic kit that I recommend having to approach this type of photography in the best way possible.

However, I do not deny that it is possible to photograph by holding a square and placing it in front of the lens, avoiding the purchase of a holder and adapter ring, perhaps even without using a tripod. Still, I am equally convinced that this “tactic,” although more economical, is counterproductive:
Firstly, because the hand will never be perfectly steady, and the filter’s position relative to the scene being captured will be at best approximate. Secondly, because in these conditions, the essence of this photographic experience, which is based on a calm and reasoned study of composition and exposure, would be lost.
Let’s now move on to the detailed analysis of these three components.
THE LEE FILTERS SYSTEM


Lee Adaptor Ring
Aluminum threaded ring that is screwed onto the front of the lens. Its purpose is to host and support the filter holder in front of the lens.
These rings are produced in various sizes to fit the different diameters of lenses on the market.
Lee Filters markets two types of Adaptor Rings: the “Standard” and the “Wide Angle“.
The first, as the name suggests, are standard, or the classic version. The latter, the Wide Angle rings, are preferable when using ultra-wide-angle lenses, as they allow you to bring the filters as close as possible to the front lens, reducing the possibility of vignetting.

Lee Filter Holder
The filter holder allows for accommodating a specific number of plates (1, 2, 3, or 4) in its dedicated slots (compartments/slots). It is designed to hold standard filters with a width of 100 mm.
The two most well-known commercialized versions are:
The “Foundation Kit“, which is simpler and more affordable.
The “Professional Kit“, which is more elaborate and expensive.
While the “Professional Kit” consists of two standard holders connected together with a hinge to provide more compositional freedom, the “Foundation Kit” is sold as a single filter holder, pre-assembled, with two mounted slots.
In both cases, it’s up to the buyer to decide whether to modify the default configuration by adding or removing slots as desired. The assembly process is, in any case, very quick, as it essentially involves unscrewing and screwing back in 4 screws.

The holder is made of plastic.
To attach itself to the adapter ring, the filter holder utilizes a quick-release metal clamp, the grip of which is ensured by a straightforward spring mechanism.
This allows, among other things, the holder and the filters mounted on it to be rotated 360° by simply loosening the spring clamp.
I would like to thank Lee Filters for their kindly permission to reproduce this picture.

Lee Filters
The variety of filters produced by Lee allows for meeting diverse needs.
From colored polyester filters to glass neutral density filters, there is truly something for every requirement. Although many of them can find their place in landscape photography, what is “truly essential” narrows down to five models, which we will delve into right away.

Neutral Density Standard Filters (ND)
They are the classic non-graduated ND (Neutral Density) filters, meaning they are homogeneous.
They are made of high-quality resin material. Each individual filter is crafted and finished by hand.
They have a square shape with a side length of 100 mm.
They are available in various variants, depending on the level of light reduction. The most well-known and commonly used variants are: 0.3 (1 stop), 0.6 (2 stops), and 0.9 (3 stops).
There are also glass versions available, called “Proglass ND Standard Filters,” which are slightly more expensive than the resin ones.

ND Graduated Hard Filters (GND Hard)
Hard-type Graduated ND (Neutral Density) filters.
As you can see from the image on the side, they have a distinct transition between the two halves of the filter.
They are made of high-quality resin material.
Each individual filter is crafted and finished by hand.
They have a rectangular shape with dimensions of 150 mm x 100 mm.
They are available in various variants, depending on the level of light reduction. The most well-known and commonly used variants are: 0.3 (1 stop), 0.6 (2 stops), and 0.9 (3 stops).
ND Graduated Soft Filters (GND Soft)
Soft-type Graduated ND (Neutral Density) filters.
As you can see from the image on the side, they have a “soft” transition between the two halves of the filter.
They are made of high-quality resin material. Each individual filter is crafted and finished by hand.
They have a rectangular shape with dimensions of 150 mm x 100 mm.
They are available in various variants, depending on the level of light reduction. The most well-known and commonly used variants are: 0.3 (1 stop), 0.6 (2 stops), and 0.9 (3 stops).

Square Glass Polariser – Circular (C-PL)
Circular polarizer square filter, made of glass.
Each individual filter is crafted and finished by hand.
It has a square shape with a side length of 100 mm. There is also a circular variant (Lee 105mm Glass Rotating Polariser – Circular), which is more convenient to use as it can be screwed onto a dedicated mount.
The light reduction caused by the inherent opacity of the glass (typical of any polarizing filter) is approximately 1.5 stops.

A special filter: “The BIG Stopper”
(10-stop ND filter)
A “special” Neutral Density filter with a light-reducing intensity of 10 stops.
Its distinctive feature is that it reduces the brightness of the capture by a whopping 1000 times!
It is used for capturing long or extremely long exposures even in daylight conditions.
It is made of glass and may appear entirely black at first glance, but it actually has a slight and uniform transparency that allows light to pass through.
It features a rubber gasket around the edges to prevent light from passing between the filter and the holder. Each individual filter is crafted and finished by hand.
Despite being called neutral, it introduces a slight cool (blue) color cast, which is a flaw somewhat expected in a filter of this magnitude. It has a square shape with a side length of 100 mm.

Example of light reduction intensity: the Lee GND Soft filter set

What to buy
After this lengthy discussion, it’s time to wrap things up and summarize what is worth purchasing to explore these tools. I’ve decided to present not just one but three “shopping lists” based on budget availability and individual needs.
Important note: I want to clarify that the recommendations provided are not official rules but are simply advice based on my personal experience.
Shopping List #1 – The Bare Essentials
– 1 Wide Angle Adaptor Ring
– 1 Foundation Kit-style Holder
– 1 0.9 Graduated Hard Neutral Density Filter
– 1 0.6 Graduated Soft Neutral Density Filter
– 1 0.9 Standard Neutral Density Filter
Shopping List #2 – A Solid Toolkit
– 1 Wide Angle Adaptor Ring
– 1 Foundation Kit-style Holder
– 2 Graduated Hard Neutral Density Filters: one at 0.6 and one at 0.9
– 2 Graduated Soft Neutral Density Filters: one at 0.6 and one at 0.9
– 2 Standard Neutral Density Filters: one at 0.6 and one at 0.9
Shopping List #3 – A Comprehensive Kit
– 1 Wide Angle Adaptor Ring
– 1 Professional Kit-style Holder
– 1 Set of Graduated Hard Neutral Density Filters: consisting of 0.3, 0.6, and 0.9
– 1 Set of Graduated Soft Neutral Density Filters: consisting of 0.3, 0.6, and 0.9
– 2 Standard Neutral Density Filters: one at 0.6 and one at 0.9
– 1 “The BIG Stopper” Filter (10-stop ND)
– 1 Square Glass Polariser – Circular Filter (circular polarizer)
EXAMPLES OF LEE FILTER USAGE
Let’s now look at some practical examples to understand how ND and GND filters actually change the appearance of a photograph.
1 – Result produced by a Neutral Density filter
(ND)

WITHOUT FILTERS
This photograph has a correct exposure, but the ripples in the water detract from an image that could be much more enchanting.

WITH ND FILTER
By using a standard 3-stop Neutral Density filter (Lee ND 0.9), it was possible to extend the exposure time by a whopping 8 times, achieving a pleasant silky effect on the water.
2 – Result produced by a Graduated Neutral Density Hard filter
(GND Hard)

WITHOUT FILTERS
This photograph exhibits a clear disparity in brightness between the sky area and the rest of the image. The picture appears “unbalanced” as a result and does not allow for the full appreciation of the intensity of the captured moment.

WITH GND HARD FILTER
By using a Hard Graduated Neutral Density filter (Lee GND 0.75 Hard) aligned along the mountain profile, the sky has taken on a much more intense character, perfectly balancing the image.
3 – Result produced by a Graduated Neutral Density Soft filter
(GND Soft)

WITHOUT FILTERS
This photograph exhibits a difference in brightness between the upper and lower halves. The contrast is not as pronounced as in the previous photograph, as the variation is very gradual.

WITH GND SOFT FILTER
By using a Soft Graduated Neutral Density filter (GND 0.6 Soft Lee) centered in the frame, it was possible to achieve a pleasing symmetry of brightness between the two halves of the image.
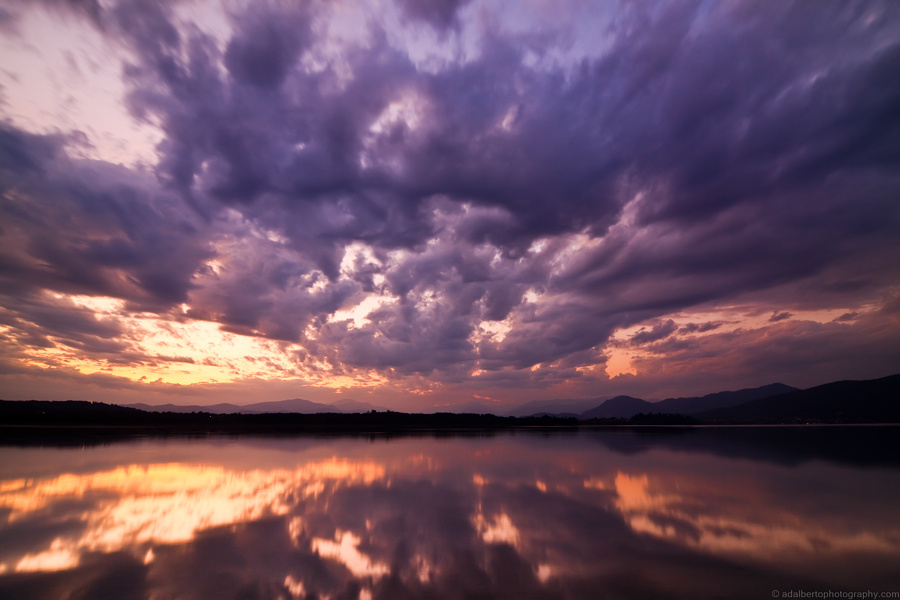
OTHER SHOTS TAKEN USING PHOTOGRAPHIC FILTERS


CONCLUSIONS
In the presence of breathtaking landscapes and with the right technique, photographic filters can truly transform a good shot into an exceptional image. Thanks to their properties, it is indeed possible to “control” and adjust light according to one’s needs.
However, their use requires a completely different approach from the typical “point and shoot.”
The allure of landscape photography, complemented by the potential of photographic filters, demands a calm and reasoned method aimed at optimizing the shot before capturing it. This approach doesn’t align with the haste and superficiality of those who, albeit innocently, rush to capture a landscape without being able to grasp and enhance its true essence.